How to Convert MBR to GPT without Data Loss?
Why Convert MBR to GPT?
Nowadays, many Windows users have come up with the question of "how to convert MBR to GPT without data loss". Also, in many technical blogs and forums, this question can be heard frequently as well. Why do they want to convert MBR to GPT? Let's see the difference between MBR and GPT as follows.
- The MBR hard disk can only support 2TB hard disk at most, but GPT can support 256TB.
- The users can only create four primary partitions or three primary partitions and one extended partition at most. The GPT can support 128 primary partitions at most.
- Some booting main boards can not support GPT as their system drive, such as MAC.
- Some Windows operating systems can not work with GPT hard disk, such as Windows 2000, XP, Windows 2003 32bit.
How to Convert MBR to GPT without Data Loss?
Diskpart
The Diskpart Command can achieve the goal by the following steps.
- Step 1: click "Start", and input "diskpart" in the searching box.
- Step 2: input "list disk", and then select the disk you want to convert by typing "select disk x"
- Step 3: input "list partition", and then select the existing partitions and delete all of them by typing "delete partition x" command.
- Step 4:: input "convert gpt".

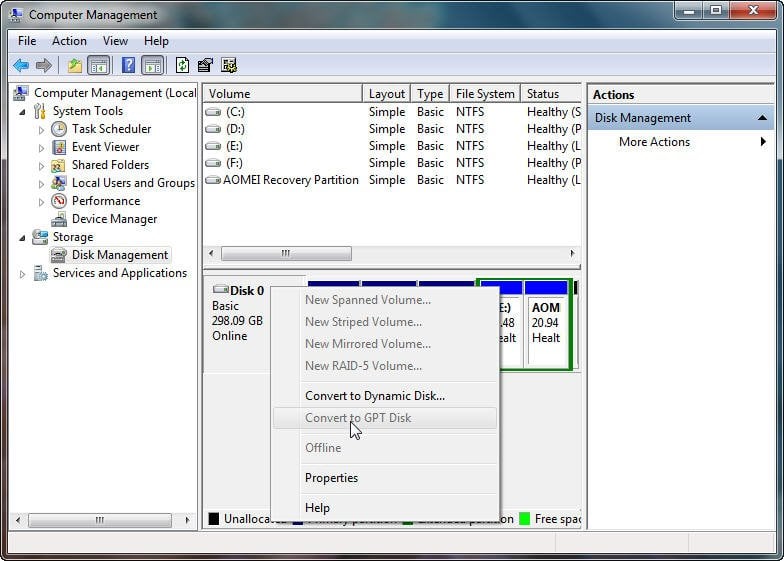
Disk Management
You can enter Disk Management by click My Computer>Manage>Disk Management and use it to convert MBR to GPT. But if there are partitions on the disk, you will find Convert to GPT Disk is grayed out. In this situation, only delete all the partitions you can continue the task.
Note
- Just like the Windows Disk Management, Diskpart Command can only realize the conversion between MBR and GPT with a great data loss. Therefore, many users have been searching for a partition assistant, which will not cause data loss.
- When the users want to convert the system drive to GPT, they have to make sure that the mother board should support the UEFI mode. If the mother board only support BIOS mode, it can not boot the operating system on GPT hard drive.
- Currently, AOMEI Partition Assistant not only supports to convert non-system disk (data disk) from MBR to GPT without losing data, but also supports for converting system disk from MBR to GPT or GPT to MBR.
AOMEI Partition Assistant: A Magic Conversion Tool
As an all-in-one disk manager, AOMEI provides the software: AOMEI Partition Assistant Professional Editionand Server Edition, which can carry out the conversion between MBR and GPT excellently, you candownload it and use them. The following will show you how to convert MBR to GPT.
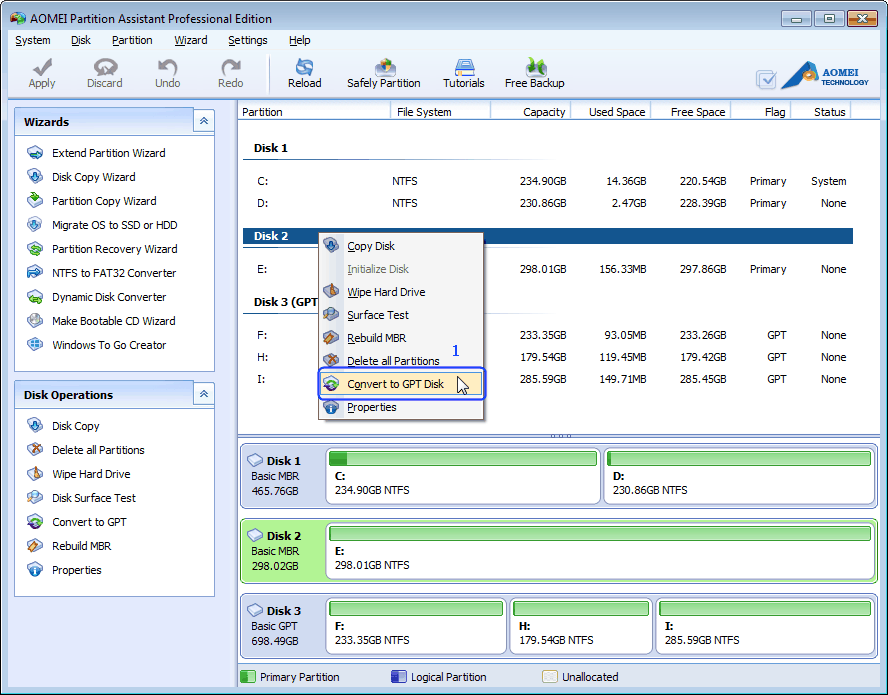
Step1: Launch the software, right click the disk you want to change and then choose Convert to GPT.
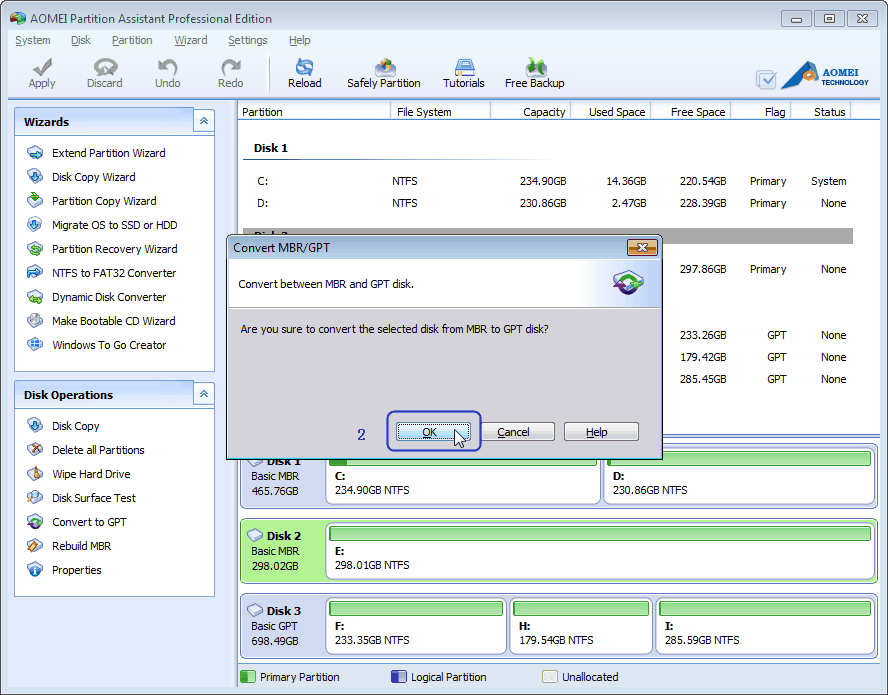
Step2: In the pop-up windows, click OK to continue.
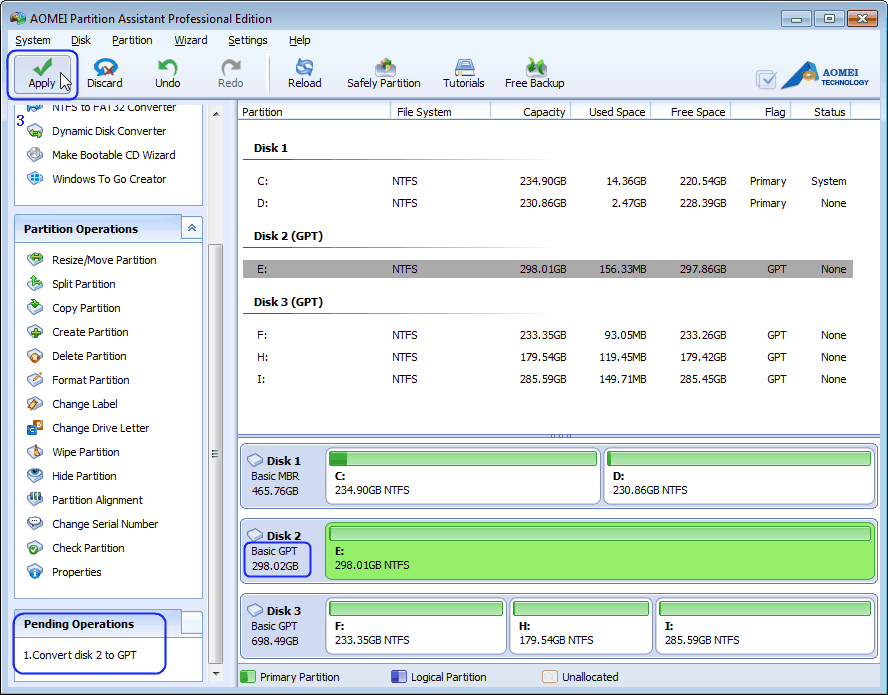
Step3: Click Apply to perform the operation and then your disk will be changed into GPT style.
With the clear prompts, the operations of conversion can be completed easily and securely. Therefore, if you are still worrying about this problem, just Download this partition assistant, and resolve the tiresome issue at once. Click here to learn more features of AOMEI Partition Assistant Professional Edition.
Comments
Post a Comment